How to run text to image models like Midjourney on AWS EC2 for less than a dollar
Generate spectacular images using Artificial Intelligence
I have a Bachelor's degree in computer science from University of Delhi and I like to work on small open source projects from time to time.
Ever since OpenAI released their image generation model back in June 2022, numerous companies released their own variations of image generation models but these provided gated access and were not publicly available.
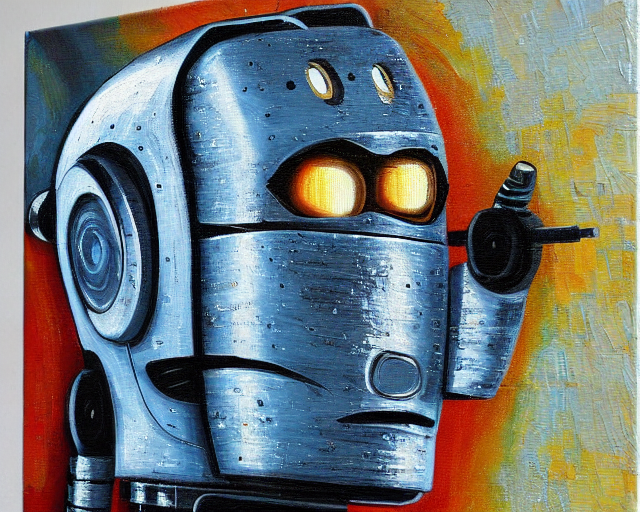
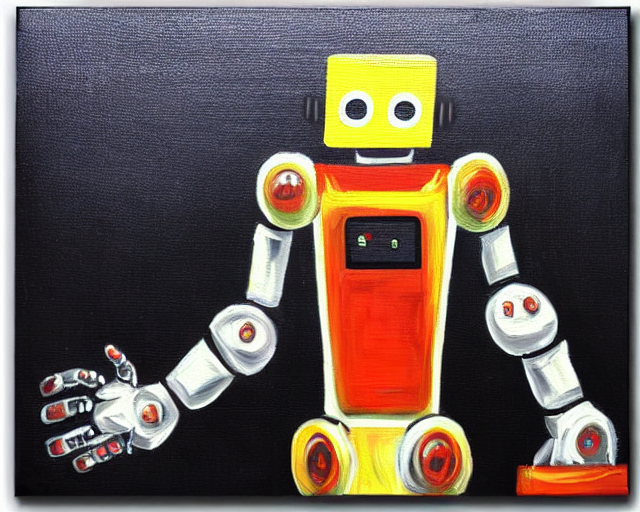
Stability AI, an AI startup, recently announced public release of Stable Diffusion, its image genearation model. What sets this apart form previously released models is that Stable Diffusion is publicly available on GitHub and it can run on high-end consumer hardware. Here is an example I made.
Although these models can run on consumer grade hardware, they typically require more than 8 gigs of VRAM and only support Nvidia GPUs at the moment. This is particularly frustrating if you have a M series Macbook or an AMD GPU. In this article we will explore how to run this model on AWS for less than $1/hr.
Note: This article assumes you already have your AWS root account setup.
1. Request Limit Increase
AWS does not allow new users to launch GPU instances to avoid unexpected large bills. Use EC2 Limits Calculator to find out your current limit. I recommend starting with either g4dn.xlarge or g5.xlarge on-demand instance type in us-east-1 region as GPU based instances are not available in all regions and some regions have higher prices.
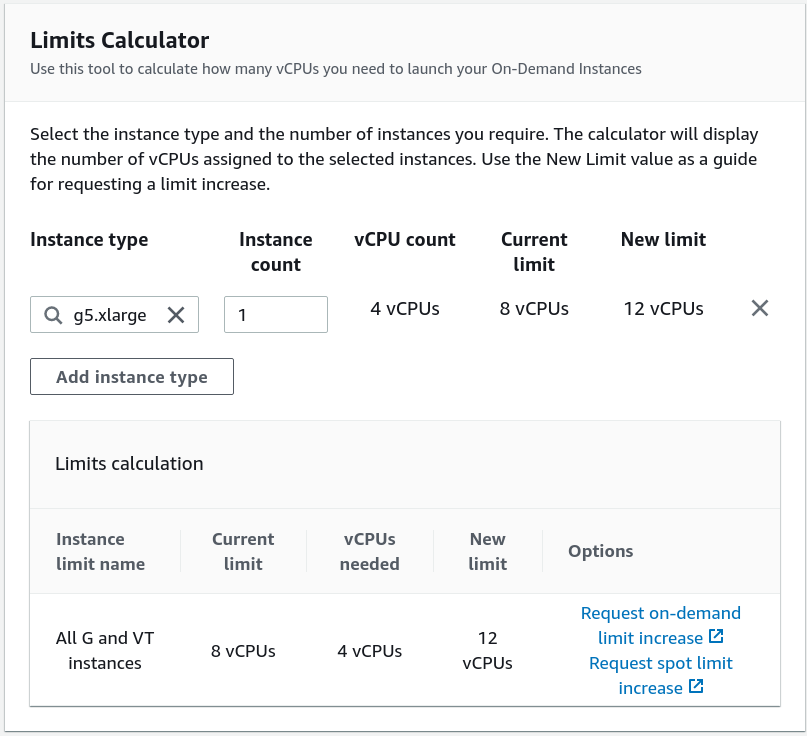
You can see in the image above that I have already increased my limit to 8 vCPUs so I don't need to increase it again. If you don't have the necessary CPU limit, lodge a request to increase on-demand limit. It should take about two working days to resolve the request.
2. Launch Instances
Click on launch instance on EC2 dashboard and change the following settings.
- Machine Image: Deep Learning AMI GPU TensorFlow 2.9.1 (Amazon Linux 2), it comes preinstalled with Nvidia GPU drivers.
- Instance type:
g5.xlarge, it comes with 16GiB of memory and costs 1.006 USD per Hour - Storage: 30 GB is enough for running model but if you plan to generate hundreds of images, I recommend increasing the storage to atleast 50 GB.
Make sure to setup your key-pair for SSH login and allow SSH traffic from anywhere network settings.
3. Clone GitHub repository
SSH into the newly created instance and clone the Stable Diffusion repository by running
git clone https://github.com/CompVis/stable-diffusion.git
4. Setup conda
Run the following command on your AWS instance to install Miniconda3.
wget https://repo.anaconda.com/miniconda/Miniconda3-latest-Linux-x86_64.sh
chmod +x Miniconda3-latest-Linux-x86_64.sh
./Miniconda3-latest-Linux-x86_64.sh
Run the following commands to setup conda environment.
export PATH=$PATH:~/microconda3/bin
conda -V
## Previous command should output installed version of conda
cd ~/stable-diffusion
conda env create -f environment.yaml
conda activate ldm
5. Download model weights
Go to Hugging Face and download the model in ~/stable-diffusion/models/ldm/stable-diffusion-v1 directory, make sure to rename it as model.ckpt.
6. Run model
Make sure you are in stable-diffusion directory before running the following commands. Run the following command to generate image from a text prompt.
time python scripts/txt2img.py --prompt "A horse standing under a tree" --H 512 --W 640 --n_iter 2 --ddim_steps 75
Download an image on AWS instance first or you can even use an image generated by model itself. In the following command, replace path/to/image.jpg with location of the image and run it to modify an image based on the given text prompt.
time python scripts/img2img.py --strength 0.8 --prompt "A tree in forest" --init-img "path/to/image.jpg"
7. Understanding the output
Running the command first time takes longer because it downloads a few required files. Because we prepended our python command with time command, terminal will show us how long it took the system to generate the images.
 Images generated from text are stored in following directory.
cd ~/stable-diffusion/outputs/txt2img-samples
Images generated from another image are stored in following directory.
cd ~/stable-diffusion/outputs/img2img-samples
8. Transfer the images
Since our AWS instance does not have a desktop environment, we need to transfer our images to see them. There are multiple ways to do so. Linux Handbook has an excellent writeup on this. I personally edited python script to run a command which automatically transfers all my files to a S3 bucket after images are generated. Here is the command to do so via python (requires aws cli to be configured).
os.system("aws s3 sync /home/ec2-user/stable-diffusion/outputs/txt2img-samples s3://location-of-my-bucket/")
9. Track resource usage
Login to the AWS instance via another window while images are being generated and run the following command.
nvidia-smi --id=0 --query --display=UTILIZATION
The above command gives the following output.
==============NVSMI LOG==============

Timestamp                                 : Sun Aug 28 21:09:05 2022
Driver Version                            : 510.47.03
CUDA Version                              : 11.6

Attached GPUs                             : 1
GPU 00000000:00:1E.0
    Utilization
        Gpu                               : 100 %
        Memory                            : 85 %
        Encoder                           : 0 %
        Decoder                           : 0 %
    GPU Utilization Samples
        Duration                          : 19.79 sec
        Number of Samples                 : 99
        Max                               : 99 %
        Min                               : 99 %
        Avg                               : 99 %
    Memory Utilization Samples
        Duration                          : 19.79 sec
        Number of Samples                 : 99
        Max                               : 100 %
        Min                               : 82 %
        Avg                               : 88 %
    ENC Utilization Samples
        Duration                          : 19.79 sec
        Number of Samples                 : 99
        Max                               : 0 %
        Min                               : 0 %
        Avg                               : 0 %
    DEC Utilization Samples
        Duration                          : 19.79 sec
        Number of Samples                 : 99
        Max                               : 0 %
        Min                               : 0 %
        Avg                               : 0 %
Running the image generation script, which produces images with that are 512 pixels tall and 640 pixels wide on a g5.xlarge instance uses nearly 100% of our GPU while only using 25% of CPU. Clearly, we need a GPU with more memory to generate images with higher resolution.
Conclusion
Being able to run models on AWS is clearly provides great flexibility in chosing our hardware with very little cost. This is great for people who want to experiment with the technology before investing in the hardware themselves.
Initial parameters, image resolution, and prompt affect the end result significantly. I recommend checking out the guide on prompt engineering to get a better understanding of the topic. More number of iterations reduces generation time per image; for example, if 1 iteration takes 1 min 30 sec, 15 iterations would take ~13 mins.
The model is not very good at generating faces, although this is somewhat intentional as it hinders the ability of producing deepfakes, but there are already some workarounds available which address this problem.
There are many many new forks of Stable Diffusion popping up everyday which extend its functionality in one way or another. I recommend checking out this fork which provides a GUI on top of Stable Diffusion.