How to add LottieFiles animations in Hashnode blogs
Find out how to embed motion graphics in your blog articles to make them more appealing.
I have a Bachelor's degree in computer science from University of Delhi and I like to work on small open source projects from time to time.
It is no secret that adding images and info-graphics to your articles boosts engagement metrics and improves SEO. Images make any content more interesting and appealing by helping readers understand your content better.
While you might already be using GIFs to make your blog stand out, we can take this further by using LottieFiles animations that can be edited programmatically. In this article I will share multiple ways of doing so.
What is a Lottie
A Lottie is a JSON-based animation file format, it uses small files that work on any device and can scale up or down without pixelation. This is useful when you want to ensure that your users have a consistent user experience on a wide range of devices.
Getting the motion graphics
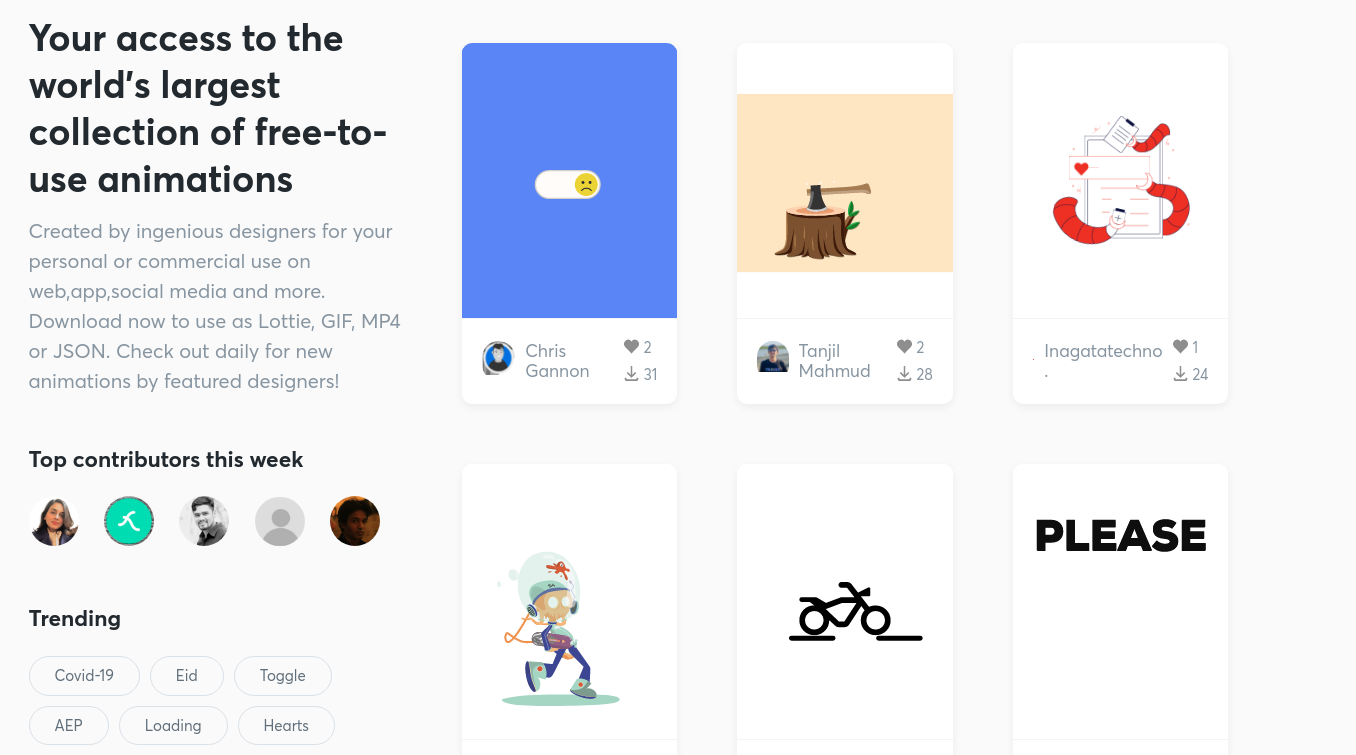 Lottie supports multiple ways of creating an animation, you can either design your own animations or buy pre-built graphics from Lottie Marketplace.
Method 1: Embed using iFrame
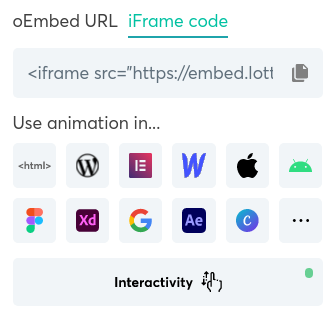
Each animation has its own embed URL and an iFrame code snippet. Hashnode only supports embed actions from a few popular providers like Facbook, Instagram and GitHub; LottieFiles embeds are not supported. You can include the animations only using iFrame tag, copy and paste the tag in Hashnode article. At this point, the code snippet and resulting animation should look something like this.
<iframe src="https://embed.lottiefiles.com/animation/116976"></iframe>
Adjust the height and width parameters
The image was imported successfully but it does not fit nicely with rest of the article and looks like it is out of place. To make it visually appealing, we will add height and width dimensions to the iFrame tag. The code should look something like this.
<iframe style="width: 100%; height: 400px;" src="https://embed.lottiefiles.com/animation/116976"></iframe>
Method 2: Use Hashnode Widgets
The included animation is interesting enough in itself but we can further personalize the animation to blend with rest of the article by customizing the playback speed, background color, etc. You can edit these properties by clicking the HTML button shown below.
After editing, copy the JavaScript code, it should look something like this.
<script src="https://unpkg.com/@lottiefiles/lottie-player@latest/dist/lottie-player.js"></script>
<lottie-player src="https://assets6.lottiefiles.com/packages/lf20_0jQBogOQOn.json"  background="transparent"  speed="1"  style="width: 100%; height: 400px;"  loop  autoplay></lottie-player>
We have a small problem now, if we paste this code snippet in an article, it is not rendered by Hashnode. To solve this problem we are going to create a widget by pasting the JavaScript code verbatim into the code section and giving it an appropriate name. Then we can include the widget in any article by using %%[widget-name] shorthand. This should produce the following animation.
Using a widget is better than using an iFrame tag as it can be reused in multiple blog articles without hassle. Furthermore, if you need to make any changes, you can do so in the dashboard without needing to edit each article individually.
Summary
We can add animated motion graphics in Hashnode articles by using iFrame tags and Widgets. These graphics can be further personalized to fit the theme and feel of the blog and make the content more appealing to the audience.